How to Find a Good Plumber Near You With Our 7 Trusty Tips for Every Homeowner

A plumber with a hose next to a sink

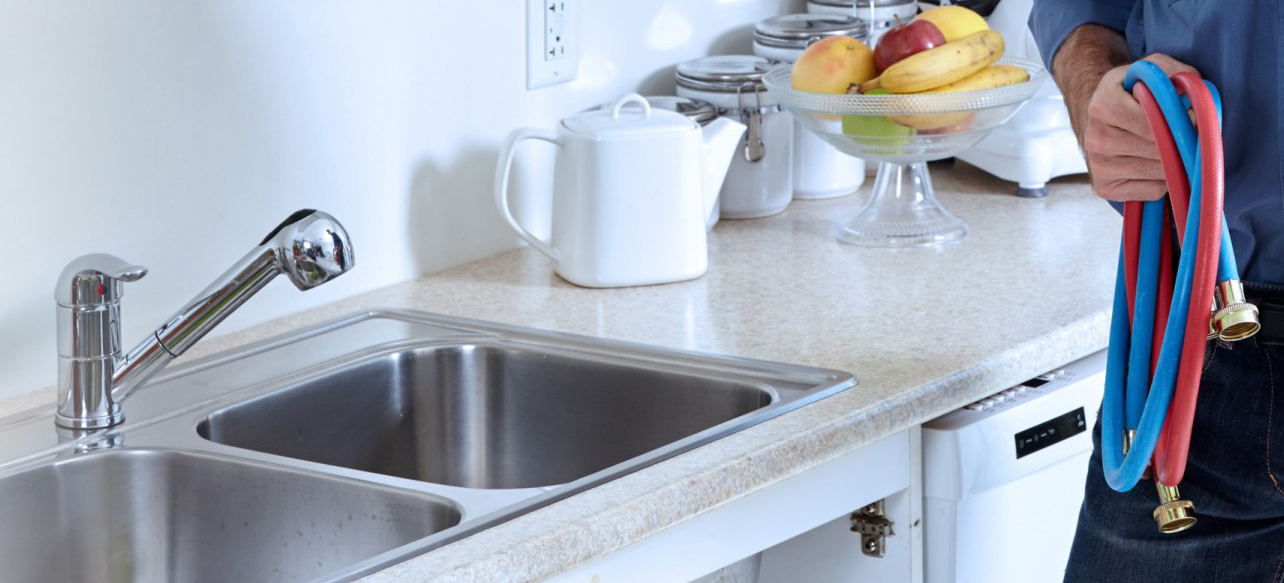
Finding a good plumber or tradesman can be a nightmare, especially if you have an emergency that cannot wait. But it doesn’t have to be! Read further and learn our 7 tips on how to find a good plumber in your area and save yourself the hassle of dealing with cowboys and shoddy workmen.

The Benefits of Finding a Reputable Plumber

Did you know that water waste in the UK amounts to ~460 million liters each year? The reason is that even the smallest of leaks can waste many liters of water. Leaks can not only cause damage to your and your neighbors’ homes but can also break the bank and have a negative impact on the environment. Hiring a “cowboy” to do the job of a professional will only contribute to these adverse effects. Here are a few reasons why hiring a reputable plumber in your area is worth every penny.

  • Good understanding of the local plumbing needs – local plumbers are familiar with the area, the parking situation, the hardware stores, and the local directives.
  • Short-notice appointments and a one-stop-shop service – hiring a local plumber often means he can come out quickly and offer you a full-package service – from diagnosing the issue to sourcing materials and completing the job.
  • Valuable advice – an expert can provide helpful tips on how to prevent the issue from recurring. They can help you with trusted recommendations, such as how to upkeep your bathrooms and plumbing installations. You get more value for your money.
  • You support the local economy – buying local is a building block of any good economy. This way, you help hard-working professionals find work and you keep your money circulating locally.

Plumber vs Heating Engineer

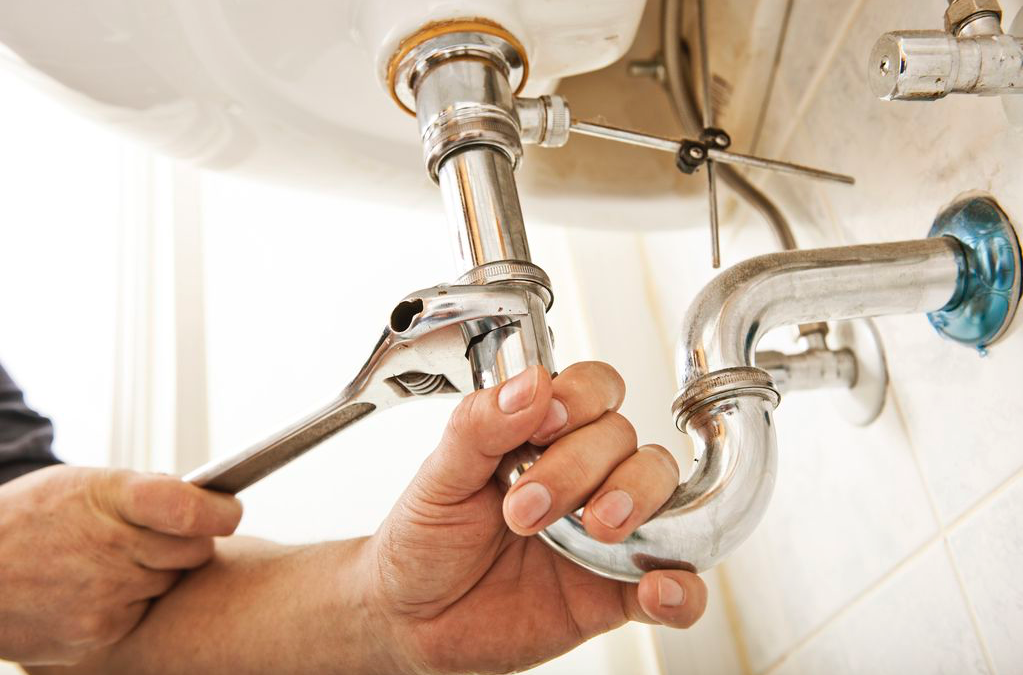
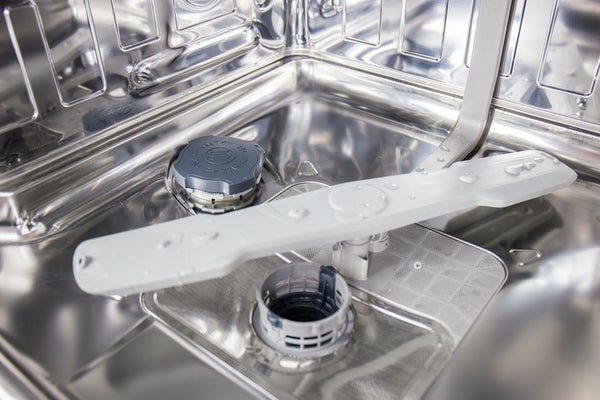
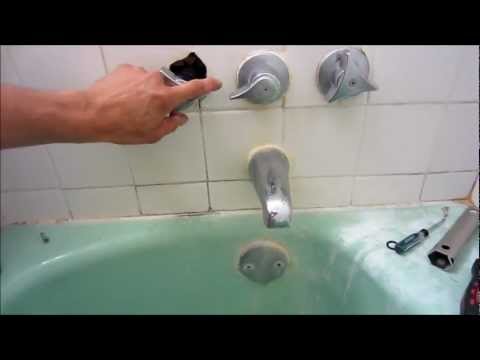
Have you ever wondered what the difference between a plumber and a heating engineer is? Plumbers deal with the water fixtures and pipework around the home. If you have a leak or a drip, you call them to fix it for you. They can install or repair showers, sinks, and toilets, and unblock a sink or a toilet. However, if you have an issue with your boiler or central heating, you need a heating engineer. They maintain, install, and repair boilers, gas appliances, and radiators. Some plumbers are also heating engineers and vice versa. The same can’t be said about a handyman vs plumber, though.

All heating engineers have completed specific training and are legally required to be on the Gas Safe Register, which allows them to work on boilers and other gas appliances. But you can’t trust every boiler engineer that knocks on your door. Some tradespeople may appear to be unqualified for specific tasks and cause further damage to your home.

A Service Company Vs Local Plumber

While it is tempting to hire a local tradesman from the yellow pages and pay a lower rate, it is worth examining the idea from all sides. For example, a one-person business would find it difficult to complete a complex project on time because they would work on their own. You would have less control over their work and no way to verify if they are as good as their ad claims or if they have proper insurance.

Hiring a recognized company comes with a lot of benefits. Foremost, it is certainly much easier to check the company’s reputation and track record online. Companies have large teams of experts, working not only Monday to Friday, but weekends, late nights, and bank holidays included. So you can rely on them whenever you need any help. In addition, it is easier to communicate with companies, since they have a dedicated Customer Service department. They can arrange your service and handle any requests or specific issues. You could easily hold them accountable for their work as opposed to individuals that become difficult to find if things go south. Not to mention that companies are committed to improving their services at all times.

You can expect your plumber to have the required certificates, qualifications, and proof of licenses and be up to date on the newest skills and trends in the plumbing world. Professional companies have strict control over their tradesmen’s health by providing personal protective equipment, guidelines, and regular checks.

How to Find a Local Plumber You Can Trust

1. Ask another tradesperson

Have you had tasks done by a handyman or an electrician, whose work you were happy with? Ask them to recommend a plumbing specialist. People in the trades business often know each other and sometimes work together on complex projects. Professionals enjoy working with other professionals, so they are likely to recommend someone reliable.

2. Look for a trusted company

Choosing a reputable plumbing service company over a relatively new and unknown one is the better option in most cases. The company’s reputation often speaks for itself, and you can’t just ignore other people’s opinions.

3. Plumbing Trade Associations

Most knowledgeable plumbers are members of a trade association. A trade association membership is a sign of quality and dedication to the craft, as they encourage focus on technical ability, customer service, and delivering top results. Being a good plumber is more than being technically adept and doing the job. It’s about communication, reliability, and trust. There is no use for a plumber who doesn’t respect your home. Good tradesmen deliver all-around professional services.

The Association of Plumbing & Heating Contractors (APHC) and the Chartered Institute of Plumbing and Heating Engineering (CIPHE) are two of the most well-known associations in the UK. Tradesmen, members of these trade associations are unlikely to jeopardize their good reputation by doing shoddy or shady work.

4. Ask friends and family

Another great source of plumber recommendations can be your friends and family. Chances are they have experienced similar issues and can recommend a tradesman you can count on. Word-of-mouth recommendations are still important and can carry a lot of weight. Plus, a personal account is a more persuasive tool than a hype ad without a customer review to back it up. If you want to find a local plumber, perhaps consider inviting your neighbors over for a cup of tea. Find out who they look up to for plumbing repairs and installations.

5. Search through directories and rating pages

Perusing through directories and rating pages improves your chances of finding a plumber you can trust. It is less likely to find a “cowboy” or wanna-be plumber listed in there. When searching, look for authenticity. Always take anonymous reviews with a grain of salt, as they cannot be verified either by you or the rating pages. Some of the most popular and credible directories and aggregator sites are:

  • YellowPages.com – one of the biggest directories
  • Yelp.com – another great directory with a rating system
  • Truspilot.com – search by rating
  • Threebestrated.co.uk – best 3 plumbing service providers in your area
  • Trustatrader.com – qualified professionals registered with a trade association

Don’t rush the decision unless you are in an emergency. Search the second and third pages, since forward placement doesn’t guarantee better service quality.

6. Read reviews and testimonials

Most advertisements claim that you get the best service for the best price. These ads are catchy to hear on the radio or read on the internet, but they rarely provide more than brand recognition. While this is important, it does not give you the security and peace of mind that your home and family are in good hands. Take the time to carefully evaluate reviews and testimonials on aggregator pages or the company website. It is important to look for authenticity and honesty, so better look for the following information:

  • What was the project?
  • When was it carried out?
  • Were there any issues?
  • What is the result?
  • Would the customer consider hiring the same plumber again?

7. Compare rates and collect quotes over the phone

Like with any other service, it is best that you receive 3 or more quotes to compare the costs and the service perks. The more complex the job is the more quotes you need to get, and the more questions you should ask. Depending on the requirements of a specific situation, they might give you a quote over the phone or after a survey. Beware of suspiciously low rates. Most good plumbers know what their work is worth. It’s unlikely that they will charge either too little or too much. A low price might mean a lack of licenses or specialized knowledge. Another trick to watch out for is quoting only for part of the job and then charging extra for “the additional work”. To avoid these situations, you need to have the following information:

  • Does the plumber have Public Liability Insurance?
  • Is the tradesman a licensed professional?
  • What is the guarantee?
  • How is the service charged – by the hour or is it a fixed price?
  • Do you get a quote in writing with a description of everything included as part of the service?
  • Does the professional bring his own tools for the job?
  • What are the hidden costs?
  • Do you get a hard copy invoice?

A good tradesman can:

  • Make sure he understands all your wishes and concerns;
  • Explain what he does to fulfill the request to the highest standards;
  • Clearly explain how the price forms and what does it include;
  • Be patient, friendly, clean, and professional.

The work of the plumber you hire might affect the health of your family. Saving a few pounds is not always worth it. It’s important to remember that you are paying for a lot more than just the time spent on the job, you are paying for expertise and skills.

In The Case of Plumbing Emergencies

Sometimes you just don’t have the time to carefully research your plumber. Have you signed for home emergency coverage? Your insurer should send a reputable professional to fix your problem. Give the plumber specific information about the issue. Don’t forget to ask about a guarantee and the rough costs. The tradesman should be able to give you the call-out price, but additional costs often depend on the nature of the issue.

And if you need urgent assistance, find a reputable company to book an emergency plumber in your area.

How to Avoid Common Plumbing Scams

Emergency Plumbing Services — When Do You Need It? - Empire House SD

Unfortunately, there are some rogue plumbers or even just plain scammers out there. To avoid falling victim to a plumbing scam, we recommend that you consider the following guidelines:

  • Ask for identification, proof of license and insurance;
  • Ask for company address, telephone number, e-mail, and opening hours;
  • Do not give money “under the table” – ask for a receipt for every payment you make;
  • Do not trust door-to-door plumbers;
  • Ask for a written quote with details about the work;
  • Never sign a blank document or a vague contract.

Takeaways

A good plumber is someone professional, trustworthy, and dedicated to his craft.  Quality is of the utmost importance for you and your family’s comfort and safety. Take the time to thoroughly research the plumbing companies and be mindful of your choice.

What Do I Do If My AC Pipe Is Frozen?

When your AC pipe is frozen, the unit will not be able to efficiently perform its primary function of cooling your home. This can be a very terrible experience for someone that just came home on a hot summer evening. Frozen AC pipe is caused by a number of underlying problems including plugged air filter and low refrigerant charge. Whatever the cause of the problem, there are a few things you can do to get the unit working again. See below our tips on how to unfreeze your AC pipes:

Frozen AC Lines - What is the cause - YouTube

Check the Air Filter

This is probably the best thing to do first. Find your return vent, unscrew the cover, and check your air filter. If it is clogged, clean it or replace it with a new one. This is an easy procedure you can perform on your own.

Thaw Your AC Unit

It is simple to thaw your AC unit: this will get the pipes and other parts ready to work properly again. To achieve this, there are two simple things you can do. You should start by switching your thermostat to ‘OFF’. The defrosting process will start immediately.

Next, you have to make sure that your condensate pan is draining properly to eliminate the risk of water damage. You can throw in a few condensate pan cleaning tablets to make your home smell nice afterward. Give your AC unit a few hours to fully defrost and it will be ready for use again.

Start Your AC Again

Is It Cheaper to Leave My Air Conditioner on All Day? | Sansone Air Conditioning

When you are sure that your AC pipe has been fully defrosted, you can start it up again. All you need to do is switch the thermostat back to COOL and observe the unit cool your home.

It is important to note that while the steps above can unfreeze your frozen AC pipe, it doesn’t solve the problem completely. It is reasonable to contact an HVAC professional, especially if your AC pipe freezes often.

You can always call on our expert team at our service. Whether your AC pipe freezes once in a while or frequently, we will provide a lasting fix to the underlying problem. We guarantee you excellent AC service and AC repair that give 100% customer satisfaction.

Essential Plumbing Tools For The Home

Whether you are a do-it-yourself (DIY) plumbing expert or you’re more of a newbie, having the right tools on hand is critical for preventing plumbing disasters and for making home repairs efficiently. Be prepared! You never want to be caught off guard in case of an emergency! Here are six plumbing tools every homeowner should have at their disposal, courtesy of our plumbing services. Contact us today to schedule plumbing repairs or to learn more about all the plumbing services.

Roll Of Duct Tape

It’s simple and yet so useful to help prevent plumbing disasters. A durable roll of duct tape is critical for homeowners because it’s water-resistant. Duct tape can fix small plumbing leaks before they grow into an unmanageable problem. The tape creates an airtight, waterproof seal — a band-aid for any tiny repairs. Duct tape is not a permanent solution to plumbing problems. Be sure to contact the plumbing experts at Sunshine Plumbing and Gas to get quick, reliable emergency plumbing repairs or answers to frequently asked plumbing questions.

6 Essential Plumbing Tools For The Home

Auger & Snake

These two tools go hand-in-hand when it comes to unclogging drains — ones that the plunger can’t handle. A plumbing auger is commonly used for toilet clogs, while a drain snake helps tackle clogs in a wide array of appliances, including bathtubs, sinks, and showers. Augurs are specially designed to easily move through the toilet drain, hook onto possible clogs, and remove them. A plumber’s snake is much more versatile — just snake the cord down the drain and slowly pull the small clog out using the attached hand crank. These two tools are excellent for minor clogs, but for more large-scale clogs in your bathroom or kitchen, contact our Ocala plumbers.

Pliers

Tongue-and-groove pliers, or water pump pliers, are a subset of slip knot pliers — the ones most homeowners are familiar with. Water pump pliers are typically used to hold nuts and bolts, grip irregular-shaped objects, and hold pipes in place. Another type of pliers to have close by are needle-nose pliers — perfect for reaching cramped and tiny spaces for a myriad of tasks in addition to plumbing, including clearing small clumps of hair or dirt out of the shower or tub drain without having to use a larger tool, such as a hand auger. For severely clogged sink drains or toilet drains, you’ll need the help of an experienced plumber.

Plunger

When a small plumbing issue arises, a plunger should be the first tool you use. There are three different types of plungers, and each one has a specific purpose. A cup plunger is what people think of when they first picture a plunger, and they are the best to use on bathroom sinks, kitchen sinks, tubs, or anything with a flat surface since you can use them to create a vacuum and to dislodge a clog. For toilet clogs, a flange plunger is an ideal option because of its fold-out flap, which fits snugly over a curved toilet drain. The third type is an accordion plunger, and it’s less common than the other two because it’s harder to use and made of plastic.

Pipe Wrench

One of the more common types of wrenches, a pipe wrench is a must-have for any homeowners’ plumbing toolkit. These wrenches help tighten, loosen, remove, or replace pipes, which is handy in a time of crisis. Its jaws can be set to accommodate almost any size pipe and are designed to grip round objects firmly. Serrations on the grip allow the wrench to apply more pressure when tightening a pipe. A pipe wrench is often used with duct tape because homeowners can put the tape on the pipe in order to keep the wrench from leaving tooth marks or gouges.

Adjustable Wrench

10 Useful Tools and Materials for Plumbing Projects

When you think of a wrench, this is the one that comes to mind. An adjustable wrench is a go-to tool for any homeowner — it’s multi-functional and can help with a variety of fixes throughout the home, including those for plumbing repair and maintenance. The adjustable size makes the wrench perfect for tightening and loosening different types of nuts and bolts. These widely available wrenches can help homeowners unscrew and fasten plumbing fixtures such as pipes, elbows, and faucets. When using an adjustable wrench, ensure the jaw is secured snugly around the pipe or fixture and always place the jaw on the side you’ll be rotating toward to avoid breaking the tool.

How to Fix a Leaky Showerhead or Shower Faucet

Testing repaired shower head

A leaky, dripping showerhead is not only annoying, it wastes water. Before you call in a professional, this fairly common household problem may be relatively simple to fix by yourself (depending on the cause of the problem).

Fix the Showerhead

Step 1: Turn Off Water

Shut off the water main to the whole house. Have a towel handy — your water main may be shut off, but there could still be some water left in the pipe that will come out.

Step 2: Remove and Inspect

Remove the showerhead by unscrewing it from the pipe with your hands. If the head is stuck on tight (as they often are if they haven’t been removed in a while), use pliers or a crescent wrench to unscrew it. Look at the threads inside the showerhead for a small plastic washer or rubber O-ring. It’s often the wear and tear of age on this component that can cause a showerhead to leak and start dripping. Over time, it dries out and becomes brittle which decreases its ability to hold in water. If it looks worn or damaged, replace it.

HELPFUL TIPS

Place a towel or large rag on the shower floor to protect it from possible damage if you happen to drop a tool. Also cover the drain so that any of the small parts from the showerhead don’t accidentally go down it.

Remember not to force anything. Whether you’re taking off the showerhead or putting it back on, don’t tighten it so tightly that you damage or crack something and then need to take on a larger project.

Step 3: Clean the Showerhead

Since you have the showerhead off, now is a good time to clean out the showerhead, especially if you’ve noticed decreased flow. Oftentimes, there can be mineral deposits or sediment left by hard water on the interior of the showerhead or at the pipe stem (where the pipe connects to the showerhead). This can significantly affect water pressure and flow and can contribute to a leaky showerhead.

In a small cooking pot or pan, mix water and three cups of vinegar and bring it to a boil. Once it’s started to boil, turn off the heat. Place the showerhead (minus any rubber parts that can be removed) into the solution and let it sit for approximately 20 to 30 minutes. Then remove, rinse and scrub the inside and outside jets with an old toothbrush; do this until no deposits remain.

Step 4: Tape It Up

If the washer or O-ring looks okay or you’ve replaced it, the next step is to wrap the threads on the pipe stem with Teflon® tape. Don’t overdo it with tape though. Wrap a thin strip around the threads at the very tip of the pipe stem.

Step 5: Reattach the Showerhead

Screw the showerhead back on by hand-tightening it until you can’t turn it anymore. Then use pliers to give it a final turn. Remember not to turn too hard or you could break the showerhead or pipe.

Step 6: Turn On the Water

Turn the water back on and then run your shower for a few seconds. Turn it off. Wait a few minutes and then check to see if there still is a drip or leak.

Fix the Shower Faucet

If you’ve fixed the showerhead and a leak persists, you may have a leak in the shower faucet. Usually, this is from a worn-out washer on the shower stem, which can easily be replaced. You don’t need to call a plumber. Follow these steps to do it yourself.

Step 1: Cut Off Water

As you did with the showerhead, you will need to cut off the water supply to the shower at the water main. Next, open the faucet and let water drain out. Keep a towel on hand to soak up water that may be released from the pipes once you remove the faucet.

SAFETY ALERT!

Because you will be standing in the tub or shower to do this project, be sure that the floor surface is dry. Any moisture could cause you to slip and fall.

Step 2: Take the Faucet Apart

How you disassemble it depends on what kind of faucet you have: one-knob or two-knob style. If you have a two-knob system then you will need to replace both valves. Use a screwdriver and crescent wrench to unscrew the valves and remove the shower faucet knobs or handles. Remove the guard and set it aside. You should see two nuts. Unscrew the larger of the two; only one of them needs to be unscrewed to reach the shower stem. Remove the shower stem by unscrewing it in a counterclockwise direction.

Step 3: Replace Washers

The shower stem works with several washers. You should replace all of them while you’ve got the faucet disassembled to make sure you cover all your bases, regardless of their condition. Look for a rubber washer at the tail of the stem. This is called the seat washer. The rest of them — packing washers — are at the center of the stem.

Step 4: Put the Faucet Back Together

Clean the pipes with an old toothbrush and a cup of vinegar and water solution. Scrub away any mineral deposits you can see on the pipes. Reattach the shower stem. Screw in the valves and reattach the knobs. After you’ve reattached the faucet faceplate or escutcheons, seal where they touch the shower wall by applying caulk around the entire plate.

Replace the Shower Faucet

If neither fixing the showerhead nor the faucet has dried up the drip, it may be time to swap your old faucet for a new one. While this project may be more involved, sometimes it is the only way to cure an ailing shower. Often this is a job for a licensed plumber, but it’s not impossible for a layman. While different faucets require different methods of replacement, below is a general guide for the most common faucets.

Step 1: Find a Replacement

Shower faucets come in many styles and sizes. Not all are interchangeable, so you need to find the correct replacement. Note that there are general guidelines (outlined in this project), but it is important to follow the manufacturer’s instructions to be sure everything is connected correctly. Get an exact measurement of the holes for the faucet and take the old one with you to find the right replacement.

Step 2: Remove the Old Faucet

Many homes have an access panel on the wall opposite the shower faucet so one can get in and work on the internal workings of the tub. If yours doesn’t, you will have to cut into the opposite wall to access and remove the old faucet and install the new one. Use a keyhole saw to cut an approximately 12″ square or rectangular hole into the wall directly opposite the faucet.

Remove the base of the faucet using a pipe wrench to unscrew the nuts fastening it to the shower fixture. Be sure the faucet has been removed completely from the water pipes. Don’t twist or turn the pipes when you’re extracting the old faucet to avoid potential complications.

HELPFUL TIP

If the pipes in your home are old, there could be complications from corroded pipes that can move around easily when you’re trying to remove the faucet. If this is the case, be careful so that you do not break the pipes which will cause water leakage behind walls and thus, a more expensive and time-consuming project.

Step 3: Install New Faucet

When putting in the new faucet assembly, you will be lining it up with the shower pipe and fastening it to the pipe with the pipe wrench. It is advised that you strictly follow the instructions from the manufacturer on how to correctly hook the new faucet up.

Step 4: Turn Water Back On

Turn the water back on at the main and check for any leaks. If you do notice any, try tightening nuts and screws to make sure everything is tight and secure. The manufacturer’s instructions can guide you. If you’ve tightened every connection and there are still leaks, disconnect the faucet and start over to make sure everything is done correctly.

Step 5: Patch the Wall

If you don’t have the access panel discussed in step 2, now you’ve got a fairly large hole in the wall opposite your shower. Don’t fret, making a wall patch and then repainting the wall will make it look like the work was never done.

Good work! No matter which fix it took, you’ll no longer hear that irritating drip, drip, drip.

Causes and Solutions for Slow Flowing Drain

Is your bathtub draining very slowly? Has the sink been filling up then slowly draining out when you finish washing your hands? You could be dealing with any number of potential problems, including a partial clog somewhere in the system.

At Four Seasons Plumbing & Sewer, we understand how important it is to keep water flowing quickly in the home. To help you avoid calling the plumber and paying an expensive fee, we’ve put together a few common causes of slow emptying drains and some easy home solutions to try out.

Hair Clog in the U-Bend

If you have long hair it will go down the drain, catch on the walls of the pipe, and eventually, cause a clog as other hair snags on it. Over time, this can build up and completely block the drain or make it drain veeerrry slowly.  Thankfully, a little maintenance helps keep this from happening in the first place. 

To get rid of a burgeoning hair clog, unscrew the drain strainer and set it aside. You may see the hairball just inside the pipe. Use a long pair of needle-nose pliers to pull it out. If you are dealing with a deeper clog, get a plastic drain snake or hair hook and send it down the pipe to try and snag on the hairball to pull it out. If you are successful, you’ll likely see faster draining water immediately.

Built-Up Grease or Food Particles

Clogs that are the result of built-up grease and food may be cleaned out by a chemical brew. Try adding the following to your drain in this order:

  • ½ cup salt
  • ½ cup baking soda
  • ½ cup vinegar

Allow the mixture to sit in the pipes for about twenty minutes. Last, heat a pan of water to boiling and allow it to work for three minutes. You can repeat the process again if you feel like the drain has only partially cleared.

Generic Clogged Sink or Toilet

If you have a clog that is being stubborn, you could also try the plunger method. Purchase a sink plunger or a toilet plunger. If you are plunging the sink, you’ll need to plug up the overflow hole to maintain pressure when plunging. Run a little water into the sink or toilet. Place the plunger over the drain and depress it rapidly several times. Remove the plunger and check to see if the water has drained. You can try this repeatedly to alleviate the partial or total clog.

Be aware that you can potentially damage the pipes if the clog is awfully bad. Just try plugging a few times and call a specialist to clear your drain if you can’t get it cleared. Four Seasons Plumbing & Sewer can help out with a fast quote for drain cleaning services right away.

Dishwasher Won’t Drain? 8 Steps to Fix It

shutterstock_1777403414--1-.jpg

One of the most common problems reported to plumbers by homeowners is when a dishwasher won’t drain. While it can be scary to open the dishwasher door and see standing water at the bottom, it isn’t always a plumbing emergency. In fact, you may be able to correct the problem yourself without professional help. 

What to Do When Your Dishwasher Won’t Drain 

If draining your dishwasher is an issue, here are eight simple techniques to try at home.

1.  Run the Disposal  

garbage-disposal-food.jpg

A full garbage disposal or an air gap in a connecting hose can prevent water from properly draining out of the dishwasher. Simply running the disposal for about 30 seconds may fix the issue.  

2. Check for Blockages  

shutterstock_311047067.jpg

Check the bottom of the dishwasher to make sure that an item or pieces of food haven’t fallen from the rack to block the water flow.  

3. Load the Dishwasher Correctly  

40391989_ml.jpg

Make sure you’re loading the dishwasher correctly. Read the manufacturers’ instructions or owner’s manual for tips and directions on how to load dishes for best results. 

4. Clean or Change the Filter 

shutterstock_1310040955--1-.jpg

You may have a clogged dishwasher filter that’s preventing water from draining. Many homeowners don’t realize that dishwasher filters need to be cleaned regularly. Check your owner’s manual to see where the filter is located on your dishwasher, and for instructions on how and when to clean it. For many dishwashers, the filter can be found on the inside bottom of the appliance. 

5. Inspect the Drain Hose 

shutterstock_1615829110--1-.jpg

Check the drain hose connecting to the sink and garbage disposal. Straighten any kinks that you may see, which could be causing the problem. Blow through the hose or poke a wire hanger through to check for clogs. Make sure the hose seal is tight, too.

6. Double-check the Drain Valve 

shutterstock_161660264.jpg

Inspect the drain valve found on the valve bracket, often located at the bottom of the machine. Push on the valve to make sure it moves freely and isn’t stuck. 

7. Try Vinegar and Baking Soda 

bakingsodavinegar.png

Mix together about one cup each of baking soda and vinegar and pour the mixture into the standing water at the bottom of the dishwasher. Leave for about 20 minutes. If the water is draining or starting to drain at that time, rinse with hot water and then run the dishwasher’s rinse cycle. That may be enough to help loosen any clogs or debris that are preventing the dishwasher from draining properly.  

8. Listen to Your Machine While It’s Running 

shutterstock_1354929278--4-.jpg

Listen to your dishwasher while it’s running a cycle. If it doesn’t make the usual operating sounds, particularly if it’s making a humming or clicking noise, the drain pump and motor may need replacing. If this occurs, it may be time to call a professional for help.  

How to Properly Drain a Dishwasher 

If you need to clear standing water at the bottom of a dishwasher, here’s how to drain it: 

  • Line the floor under the dishwasher with towels or newspaper.  
  • With a measuring cup or a large ladle, scoop the water from the bottom into a bowl or the sink.  
  • When the water becomes too shallow to scoop, soak up the remaining moisture with cloth or paper towels. 

Always make sure that you’re using the right type of dish detergent per the manufacturer’s directions, to avoid clogging the drain. Taking some preventative steps to keep your dishwasher running smoothly can also help you avoid drainage issues in the future. 

Solved! What to Do About a Leaking Garbage Disposal

Suspect a leak in one of your kitchen’s hardest working appliances? Troubleshoot the problem and repair leaking garbage disposal with these tips and techniques.

How to Fix a Leaking Garbage Disposal Yourself

Q: Lately, the cabinet under my kitchen sink has been getting mysteriously soggy. Could this be a symptom of a leaking garbage disposal? If so, how can I repair it myself?

A: A leaking garbage disposal often goes unnoticed until you confront a sopping cabinet, a foul-smelling puddle, or an audible drip-drip-drip from the unit. The fix can be frustrating, too, because the leak can stem from a number of components in the system. Fortunately, with a little sleuthing, you can zero in on the leak and—depending on the exact location—stop the icky oozing and repair the component that caused it. Worst case scenario, if it turns out that the garbage disposal must be replaced, installing a new one is a reasonable do-it-yourself task for those with basic plumbing skills. Read on to keep the cash you’d otherwise hand over to a pro.

How to Fix a Leaking Garbage Disposal Yourself

Prepare to find the leak.

Prior to testing the garbage disposal for leaks, unplug it at the wall outlet and turn off the power from the breaker box to prevent electrical shock. Then insert a watertight sink stopper into your sink drain and wipe the unit dry with a clean cloth. In any handy container, mix a few drops of food coloring into a few cups of water, and pour the dyed water onto the sink stopper to help you locate the leak.

Investigate the source.

Using a flashlight, examine the unit for escaping colored water, which is likely to come from one of three places:

  • the top, where the disposal meets the sink drain
  • the side, where the dishwasher hose or main drain pipe connects to the disposal
  • or the bottom of the unit

Inspect each of these locations while gliding a light-colored rag over the unit; the dyed water will readily show on the rag and reveal the location of the leak. If a leak isn’t immediately apparent, remove the sink stopper and pour a few more cups of dyed water down the sink drain, then check for leaks again. Leaks near the top of the unit are more likely to show themselves while the sink is plugged, while side and bottom leaks are more noticeable while the sink is unplugged.

How to Fix a Leaking Garbage Disposal Yourself

Photo: istockphoto.com

If the top of the garbage disposal is leaking, re-seal and tighten the flange.

The metal sink flange that sits directly inside the sink drain is typically sealed around the top with plumber’s putty (a clay-like sealant) and then secured from under the sink with bolts. If the plumber’s putty deteriorates, or the bolts loosen, the flange can no longer form a watertight seal between the sink drain and the disposal—which could cause a leak at the top of the unit.

To reseal the leaky flange, you must first detach the garbage disposal. Start by loosening the screws securing the main drain pipe to the disposal, then loosen the screws in the metal clamp securing the dishwasher hose to the disposal and detach the drain pipe and dishwasher hose from the disposal. Loosen the screws in the mounting ring that connects the disposal to the metal mounting assembly beneath the sink, then pull down the disposal and carefully set it on a clean, dry surface. Loosen the bolts in the mounting assembly with a wrench, then pull down the mounting assembly and set it near the disposal.

Lift the sink flange from the top of the sink. Use a plastic putty knife to scrape off the old plumber’s putty around the top of the flange, then wipe off any putty residue with a damp rag. Now grab a palmful of plumber’s putty (available at hardware stores, home centers, and online) and roll it into an eighth-inch to quarter-inch-wide “rope” with a length roughly equal to the circumference of the flange. Wrap the rope of putty around the top of the flange like a collar, then insert the flange into the sink drain opening until snug. Re-install the mounting assembly and mounting ring (taking care to securely tighten the mounting bolts on the mounting assembly), then re-attach the garbage disposal, drain pipe, and dishwasher hose in the reverse order you detached them.

If you see that it’s the side of the garbage disposal leaking, tighten drain line connections and replace worn gaskets.

Two drain lines extend from the sides of a garbage disposal: a narrower dishwasher hose that connects the dishwasher drain pipe to your disposal’s dishwasher inlet, and the main drain pipe that connects your disposal to the sewer through an outlet in the wall.

Solved! What to Do About a Leaking Garbage Disposal

Suspect a leak in one of your kitchen’s hardest working appliances? Troubleshoot the problem and repair a leaking garbage disposal with these tips and techniques.

By Bob Vila

  •    
How to Fix a Leaking Garbage Disposal Yourself

Photo: istockphoto.com

Q: Lately, the cabinet under my kitchen sink has been getting mysteriously soggy. Could this be a symptom of a leaking garbage disposal? If so, how can I repair it myself?

A: A leaking garbage disposal often goes unnoticed until you confront a sopping cabinet, a foul-smelling puddle, or an audible drip-drip-drip from the unit. The fix can be frustrating, too, because the leak can stem from a number of components in the system. Fortunately, with a little sleuthing, you can zero in on the leak and—depending on the exact location—stop the icky oozing and repair the component that caused it. Worst case scenario, if it turns out that the garbage disposal must be replaced, installing a new one is a reasonable do-it-yourself task for those with basic plumbing skills. Read on to keep the cash you’d otherwise hand over to a pro.Some jobs are better left to the prosGet free, no-commitment estimates from licensed plumbers near you.FIND PROS NOW+

How to Fix a Leaking Garbage Disposal Yourself

Photo: istockphoto.com

Prepare to find the leak.

Prior to testing the garbage disposal for leaks, unplug it at the wall outlet and turn off the power from the breaker box to prevent electrical shock. Then insert a watertight sink stopper into your sink drain and wipe the unit dry with a clean cloth. In any handy container, mix a few drops of food coloring into a few cups of water, and pour the dyed water onto the sink stopper to help you locate the leak.

Investigate the source.

Using a flashlight, examine the unit for escaping colored water, which is likely to come from one of three places:

  • the top, where the disposal meets the sink drain
  • the side, where the dishwasher hose or main drain pipe connects to the disposal
  • or the bottom of the unit

Inspect each of these locations while gliding a light-colored rag over the unit; the dyed water will readily show on the rag and reveal the location of the leak. If a leak isn’t immediately apparent, remove the sink stopper and pour a few more cups of dyed water down the sink drain, then check for leaks again. Leaks near the top of the unit are more likely to show themselves while the sink is plugged, while side and bottom leaks are more noticeable while the sink is unplugged.

How to Fix a Leaking Garbage Disposal Yourself

Photo: istockphoto.com

If the top of the garbage disposal is leaking, re-seal and tighten the flange.

The metal sink flange that sits directly inside the sink drain is typically sealed around the top with plumber’s putty (a clay-like sealant) and then secured from under the sink with bolts. If the plumber’s putty deteriorates, or the bolts loosen, the flange can no longer form a watertight seal between the sink drain and the disposal—which could cause a leak at the top of the unit.ADVERTISEMENT

To reseal the leaky flange, you must first detach the garbage disposal. Start by loosening the screws securing the main drain pipe to the disposal, then loosen the screws in the metal clamp securing the dishwasher hose to the disposal and detach the drain pipe and dishwasher hose from the disposal. Loosen the screws in the mounting ring that connects the disposal to the metal mounting assembly beneath the sink, then pull down the disposal and carefully set it on a clean, dry surface. Loosen the bolts in the mounting assembly with a wrench, then pull down the mounting assembly and set it near the disposal.

Lift the sink flange from the top of the sink. Use a plastic putty knife to scrape off the old plumber’s putty around the top of the flange, then wipe off any putty residue with a damp rag. Now grab a palmful of plumber’s putty (available at hardware stores, home centers, and online) and roll it into an eighth-inch to quarter-inch-wide “rope” with a length roughly equal to the circumference of the flange. Wrap the rope of putty around the top of the flange like a collar, then insert the flange into the sink drain opening until snug. Re-install the mounting assembly and mounting ring (taking care to securely tighten the mounting bolts on the mounting assembly), then re-attach the garbage disposal, drain pipe, and dishwasher hose in the reverse order you detached them.

If you see that it’s the side of the garbage disposal leaking, tighten drain line connections and replace worn gaskets.

Two drain lines extend from the sides of a garbage disposal: a narrower dishwasher hose that connects the dishwasher drain pipe to your disposal’s dishwasher inlet, and the main drain pipe that connects your disposal to the sewer through an outlet in the wall.ADVERTISEMENT

If you spy a leak on the side of the disposal where the dishwasher hose meets the disposal’s dishwasher inlet, the problem could be that the metal clamp connecting them is loose. In that case, tighten the screws in the metal clamp with a screwdriver.

If the leak is on the side where the disposal meets the waste drain pipe, loosen the screws that secure the drain pipe to the disposal and inspect the rubber gasket inside the pipe—it may well be worn out. Replace the gasket and re-tighten the drain pipe screws.

If the bottom of the unit is leaking, replace the disposal.

Leaks from the bottom of the garbage disposal (often from the reset button) commonly indicate that at least one seal on the interior shell of the unit that protects the motor has deteriorated, or that the shell itself has cracked. These vulnerabilities can cause water from the sink to seep into the shell of the disposal and leak out of the base of the unit. In an old garbage disposal, one compromised internal seal is often accompanied by others, so your best bet is to install a new one.

RELATED: The Best Garbage Disposals, According to Happy Homeowners

Hiring a pro to replace the unit will run you $400 on average, including labor and parts, or you can install a garbage disposal yourself and save anywhere from $90 to $200 in labor costs. You should be able to get eight to 15 years of use out of a new garbage disposal.

Check your work by running water through the drain.

Whether you repaired or replaced the leaking garbage disposal, test for any missed problem spots. Wipe the unit dry with a clean cloth, then unplug the sink drain (if plugged) and pour a few cups of dyed water into the drain once more. Use a flashlight to inspect the entire unit. If you don’t observe a leak, turn on the power to the disposal from your breaker box and plug in the disposal at the wall outlet.

Prevent future leaks.

Proper use of a garbage disposal can stave off future leaks. So remember to grind only soft foods; hard items such as bones, apple cores, or raw potatoes can dislodge or damage the internal seals. Run cold water through the sink drain before and after food disposal to keep solid fats from congealing into gunk (which can deteriorate the sink flange and cause leaks). Finally, inspect your disposal for leaks at least twice a year using the dyed-water test to catch and repair minor leaks before they lead to water-damaged sink cabinets or kitchen floors.

Different Types of Plumbing Control

valve is responsible for regulating the flow of water in your pipes. If your pipes didn’t have a regulator, then your water bills would have gone through the roof. There is a variation of materials available, as well as designs. Some can only turn on or off the water flow, or adjust its volume.

Here are five types of plumbing controls to know which is appropriate for the kind of pipes in your home.

Ball Valve

The ball valves are known to be the most reliable plumbing control type. They are used mainly for main water shutoffs and branch line shutoffs. The ball valve can either allow a full flow of water or stop it completely. Inside of it is a ball with a hole in the middle, which is attached to a lever-type outer switch. If the handle is parallel to the water supply pipe, then the valve is open; if it is perpendicular, then it is closed.

Butterfly Valve

This type has a lever-type grip that opens and closes the valve. There’s a metal disc inside that revolves to adjust the flow of water. When the water revolves around it, the water flow is reduced to an extent, even when the valve is fully open. Unlike the ball valve, the butterfly type can accurately adjust the volume of flow. However, it has a gasket that can trouble you with maintenance issues after several years. The butterfly valve is primarily used in industrial applications.

Gate Valve

Gate valves control the water flow by raising or lowering the gate inside by a twist-type knob located at the top of the valve. It would be best if you don’t use gate valves to control the volume of flow. It is designed to be fully opened or fully closed. It can easily wear out if you use it to adjust the water flow.  

Its internal metal parts may get rusty, so it is common for a gate valve to get jammed in an on or off position. Gate valves should be used to shut off the water occasionally.

Check Valve

The check valve keeps water flowing in one direction only and prevents it from flowing in the opposite direction. Most of this type does not have control handles, making them less functional. Check valves use different types of inner mechanisms, including ball-check and diaphragm-check designs.

An example of an operational type is the stop-check that can completely stop all water flow in both directions.

Pressure-Reducing Valve

This type of valve reduces the overall water pressure in a plumbing system. It features a spring and diaphragm that you can adjust to a specific limit, depending on the water supply’s load. You can also use it to throttle down the overall water pressure. It is common in homes that receive high-pressure water from the source that can damage house plumbing systems and appliances.

Are you in need of plumbing services? At Goode Plumbing, our highly trained technicians will provide you the best customer service in Chicago, IL, and surrounding areas. Contact us right away!

How to Repair a Leaky Shower Faucet Valve

A leaky shower faucet or shower head can be both irritating and expensive. Beyond the annoying drip, drip, drip, a leaky shower faucet (valve) can waste hundreds of gallons of water every week. And worse, a leak on the hot water side of the shower valve can waste significant energy because the water heater must continually operate to warm the water being drawn unnecessarily.

One reader whose home was equipped with an electric water heater complained that his leaking shower valve caused his electric bill to triple.

Even more concerning is the shower valve that leaks inside the wall. Over time, water dribbling into the wall can cause dry rot, mold, and structural problems that can be both hazardous and very expensive to repair.

What Causes a Leaky Shower Faucet or Shower Head Drip?

When water drips or drizzles from a shower head, there is a problem with the shower faucet (valve). In most cases, inner seals are worn, or parts have become corroded or clogged with hard water deposits. And the rubber O-rings and gaskets that seal connections between moving metal parts wear down with time and use. When they do, water squirts or drips out. For more, please see How a Shower Works.

Advice for Fixing Leaky Shower Faucets

If you turn off a shower faucet and the water keeps dribbling out of the showerhead, a natural instinct is to crank the handle closed as hard as you can. Unfortunately, this may only make things worse. Be sure the faucet handle is turned all of the way off, but don’t over-tighten it! This may damage the valve.

When working on shower faucets, place rags in the tub or shower floor beneath the faucets and over the drain to protect the surfaces and prevent small parts from being dropped down the drain. Before opening up a shower valve, turn off the water supply. In some houses, a shut-off valve is located in the bathroom, near the shower, or in the basement. If you can’t find the shower shut-off valves, turn off the water supply to the entire house.

If you have to shut off the water to the entire house, plan and organize ahead of time. Read through all of the instructions and have the tools and materials that you’ll need readily on hand to minimize the time your home’s water will be off—and alert your family. After shutting off the house water, faucets and water-using appliances won’t work but each toilet will have one flush.

After you’ve turned off the water supply, open the bathroom sink faucet to drain any water from the nearby pipes.

How to Fix a Leaky Two-Handle Shower Faucet

A shower valve that’s operated by two faucet handles—one hot and one cold—is typically a compression faucet, as discussed in the article How a Compression Faucet Works. Leaks in a compression faucet generally occur when a rubber seal or washer wears out over time, allowing water to seep between movable metal parts.

Fixing a compression shower faucet involves disassembling the unit and replacing the defective washers and seals. It’s important to shut off the water supply to the shower, and to protect the surface of the tub or shower floor and cover the drain. Buy a faucet washer kit so you’ll have the necessary replacement O-rings and washers on hand. Browse faucet washer kits at Amazon.

First, feel the water leaking from the tub spout or shower head. If it’s warm, you know that the leak is coming from the hot-water valve. If the water has been dripping for a while and it is cold, the leak is probably coming from the cold-water valve.

1 Start by removing the faucet handle. Methods for doing this will depend upon the faucet’s design. Older or simply-designed faucets often have an exposed screw front and center or a locking screw in the side. Newer and more decorative models of faucets hide the screw beneath a cover cap. With these, you need to pry off the cover cap to expose the screw. If your faucet handle is the type with a cover cap and there is no obvious method of removal, use a very thin screwdriver or pocketknife to pry the cap off. Be careful not to scratch the finish or damage the material.

2 Once you’ve removed the cover cap, use a screwdriver to unscrew the locking screw, turning it counterclockwise. Remove it and set it aside. Then wiggle and pull on the handle to extract it from the faucet body. This can be difficult to do. You can buy a faucet puller, or improvise with a screwdriver as shown in the video below. Find faucet pullers on Amazon.

3 After removing the handle, remove the trim and the sleeve that fits over the faucet stem. You’ll need a plumber’s deep socket, as shown in the video, to extract the faucet stem from the valve body (you can find an inexpensive set online). Fit it over the stem’s hex nut and turn it counterclockwise to unscrew the assembly. At first, you may need to apply significant force to break it free. Unscrew the faucet stem and pull it out of the valve body.

4Replace all faucet washers, O-rings, seals, and the flat washer at the end of the stem (remove the screw to replaced the washer).

5 Then reverse the procedures to replace the faucet stem in the valve body. Before you put it in, lubricate the threads with plumber’s grease. Tighten it in the valve body. Temporarily put the handle back on, turn on the water supply, and test the valve. Then finish reassembly. Finally, seal the trim to the wall with tub caulk. Shop for tub caulk online.

How to Fix a Leaky Delta Shower Faucet

If your shower has a leaky Delta shower faucet, here is how to stop the leak. Before beginning, please read the information titled “Advice for Fixing Leaky Shower Faucets” above. Shut off the water supply to the shower and protect the surface of the tub or shower floor. Also cover the drain so you don’t accidentally drop small parts down it. Buy a Delta replacement cartridge on Amazon so you’ll have the necessary replacement on hand. Here’s a video that shows this process:

1 Remove the cover cap that hides the screw holding the handle, and then unscrew the handle and pull it off.

2 Remove the two screws that hold escutcheon trim plate in place, and then pull the escutcheon plate away from the wall, exposing the hole in the wall around the valve.

3 Slide off the outside sleeve (sometimes called a “stop tube”) by gripping it and pulling it outward. Then remove the brass bonnet with a pair of locking jaw pliers, turning it counterclockwise.

4 Remove the old cartridge by pulling off the plastic cap, and then gripping and wiggling the cartridge until it’s loose enough to pull off. Feel inside the valve area for any deposits or loose particles, and clean with a rag.

5 Then insert the new cartridge. Note that one side of the cartridge is marked “Hot” and should be positioned on the hot water (normally left) side. Push it firmly in place. If necessary, adjust the rotational limit stop, according to the manufacturer’s directions that come with the replacement cartridge.

6 Put the brass bonnet back on the valve and turn it clockwise to tighten it. Be sure the threads grip properly. Hand-tighten, and then use locking jaw pliers to snug it down. Clean the wall where the escutcheon plate goes, and then put the outer sleeve back on the cartridge and push it into place. Replace the escutcheon plate and handle.

7 Turn the water supply back on and, if everything works fine, caulk the perimeter of the escutcheon plate with tub caulk to seal it to the wall.

Contact us for more information.

Plumbing Repairs in Chicago

Affordable, Reliable, & Long-Lasting Repairs

Plumber Replacing ToiletTrusting your plumbing repair project in Chicago, IL, to the pros at Mr. Rooter Plumbing of Chicago is a great way to receive quality workmanship in a timely manner. Our team knows you depend on your plumbing, so we’re available 24/7 if you have an issue that can’t wait.

Whether it’s an emergency or a routine drain cleaning, you can trust the professionals at Mr. Rooter Plumbing of Chicago. Our trained experts can service virtually any plumbing system in your home. We understand that you and your family depend on your plumbing, so we’re available 24/7 for emergency needs

Ready to get started? Call us at (773) 360-0378!

Common Plumbing Problems in Chicago

Whatever repair your plumbing system needs, we pride ourselves on being able to offer superior service, always at an affordable price.

Here are the common plumbing repairs we can complete:

  • Dripping Faucets – Dripping faucets are annoying at best and costly at worst! Some require only a simple repair, while others are an indication of a more severe problem.
  • Leaky Pipes – Leaky pipes can be caused by things such as stubborn clogs or pipe corrosion. Regardless of the cause, leaking pipes need a repair as quickly as possible! If ignored, they can cause serious water damage.
  • Running Toilets – Running toilets can waste hundreds of gallons of water every day. Not only is this bad for the planet, but it’s also bad for your wallet! Let’s get it fixed ASAP!
  • Low Water Pressure – When noticeably low water pressure is seen in the house, this can mean there are more serious problems lurking in your plumbing system. These problems include serious clogs, pipe corrosion, or even cracked sewer lines! This is important to solve as soon as you can!
  • Common Drain Problems – Not only can slow or clogged drains cause plumbing issues, they can also cause health issues! If you have more than one clogged drain at the same time, it may mean there is an issue in your sewer line. Either way, this is something we can help with!
  • Sump Pump Issues – Sump pump failures are some of the most common plumbing repairs we complete. If your sump pump is having issues, give us a call!
  • Water Heater Problems – Whether your water heater is leaking or producing only cold water, it may be time to have a professional take a closer look.

Plumbers are the most important contractors you’ll ever have to hire for your property. A flawless plumbing system is important to any functioning home or business. We continue to remain experts in our field as we deliver superior work that speaks for itself and world-class customer service that continues to be unmatched!

Are you looking for plumbing repairs in Chicago, IL? Give us a call at (773) 360-0378 or contact us online for a free job estimate!

Why Mr. Rooter Plumbing of Chicago?

Whether it’s an emergency or a routine drain cleaning, you can trust the professionals at Mr. Rooter Plumbing of Chicago. Our trained experts can service virtually any plumbing system in your home. We understand that you and your family depend on your plumbing, so we’re available 24/7 for emergency needs.

Here are some other things our customers love about us:

  • Flexible Scheduling – Not only do we offer our 24/7 emergency line to serve you any time of the day, but we will always find a way to work around your busy life. We make appointments at a time that’s convenient for you, not us!
  • Customer Service – Our customers make us who we are! We love what we do, and we love doing it for you. Our professional technicians will always serve you with a smile. We are so confident in our services that we will always offer our work guaranteed!
  • Professionalism – There’s a reason why they call us Mr. Rooter®. We always arrive on time with a friendly and warm attitude while keeping your home clean with mats and shoe covers.
  • Expert Knowledge – Our plumbers are experts and get routine training to provide you with quality work built to last. To date, we have repaired thousands of plumbing systems.
  • No Extra Charges – We will never charge extra for weekends, holidays, overtime, or emergencies.
  • Free Job Estimates – We will always provide a price before we start the job to help alleviate the stress that comes with choosing a company to trust. If you have any questions about our pricing, please ask!

Regardless of the service you need us to perform, we are confident that you will enjoy the time spent with us. We understand that your home’s plumbing system will require more than a few visits from a plumber, and we hope you pick us every time!

Licensed Plumbing Experts

Our technicians have the tools and training to diagnose and repair a variety of problems. If you’ve experienced difficulties with your garbage disposal, we can explain what’s needed to restore service. We routinely work with homeowners who are interested in hydronic heating systems, and we can maintain the pipes and the boiler. Our national brand has millions of satisfied customers, and our punctual staff will always treat you and your property with respect. We’ll make sure our work area is clean before we leave.

For fast service in Chicago or the surrounding areas, call us anytime. When you delegate your plumbing repair project to Mr. Rooter Plumbing of Chicago, you’ll see there’s a reason they call us Mr.®